It may sound like a cliché, but it’s true: once I learned how to use Google My Maps, my travel planning improved a lot!
It became much easier to plan my trips, what to do each day; routes, distances, and travel times; saving tips for restaurants and bars; knowing exactly where hotels and Airbnbs are located; checking routes to and from the airport or train station, in short, everything related to getting around which is what we do most on any trip.
In this post, I’ll show you, step by step, how I use My Maps on my trips. I’ve learned a lot, but I know there’s still room to improve, so if you use the tool, please share your tips, I’d love to hear them and I’ll definitely learn something new.
I also know that everyone plans and organizes their trips in their own way. I’ll show you how I do it, so maybe you can take one or two ideas and adapt them to your own style.
First of all, follow me on Instagram @danae_explore – that’s where you can keep up with my trips, find lots of travel tips, and send me a DM anytime. I love chatting about travel!
How to create a travel map in Google My Maps
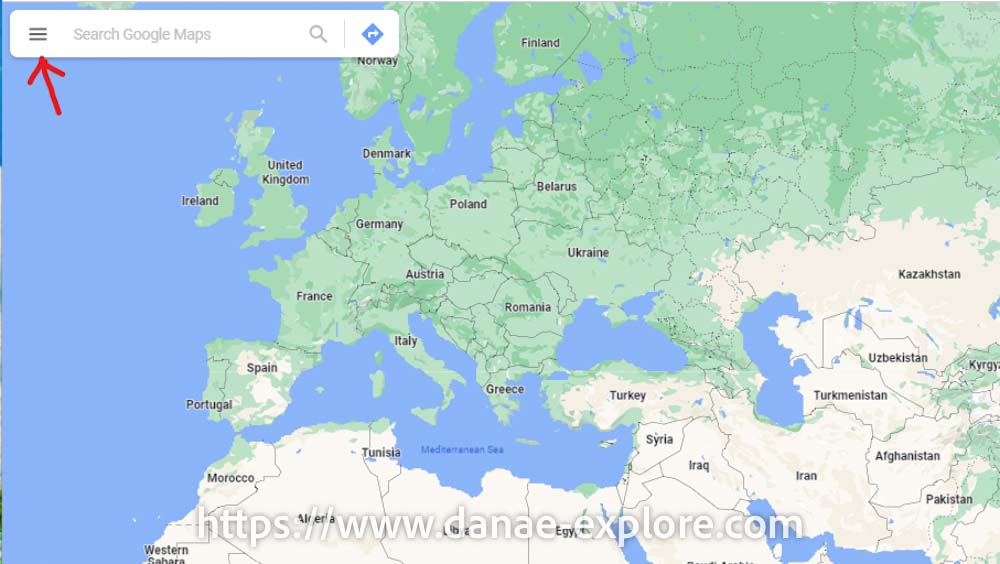
Acces, on your desktop, Google MyMaps with your Google account, or open Google Maps, click on the menu (the three lines on the left side of the search bar), then go to “Your places” and click on “Maps”.”Maps”
.
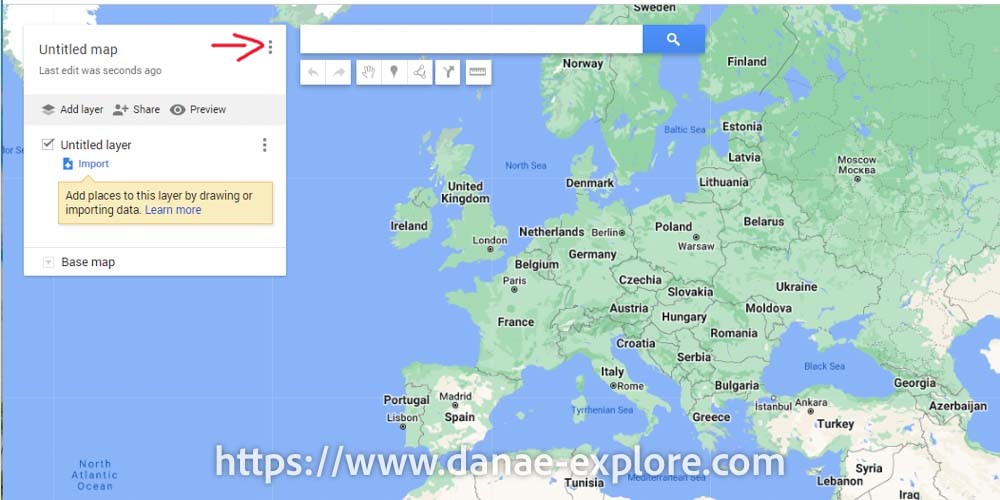
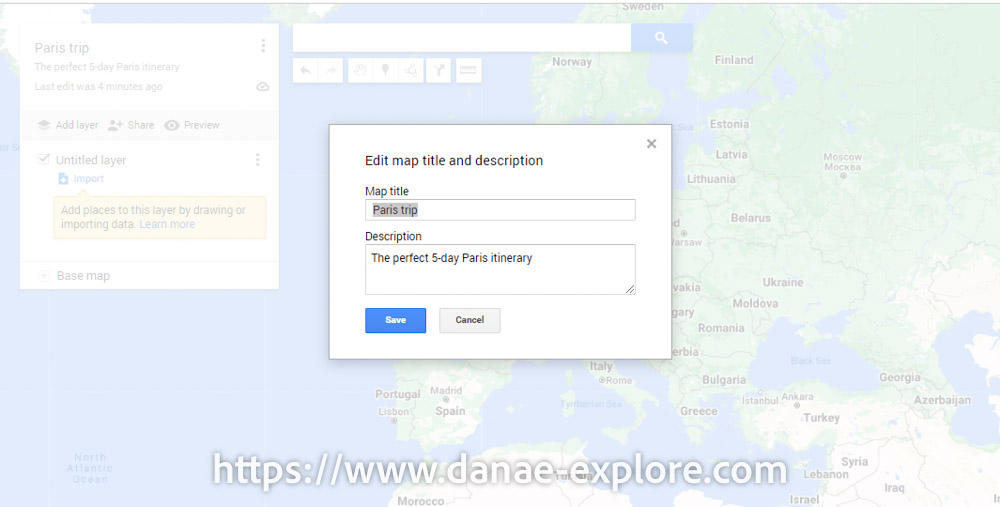
Select “Create new map” and give it a name (click on the three dots — see figure below); if you want, you can also add a brief description for your map.
.
.
.
How to include places on the travel map
Start by adding all the places you want to visit, restaurants you’d like to try or that have been recommended to you, the hotel you will be staying at, stations you will be taking the train from, etc.
Don’t worry about the order at this stage, just add everything that comes to mind. You can organize everything later. And don’t worry if you don’t know all the places yet, you can always add new ones or remove them at any time.
To add a location, type the name in the search bar. Google will suggest options and you can choose the right one.
.
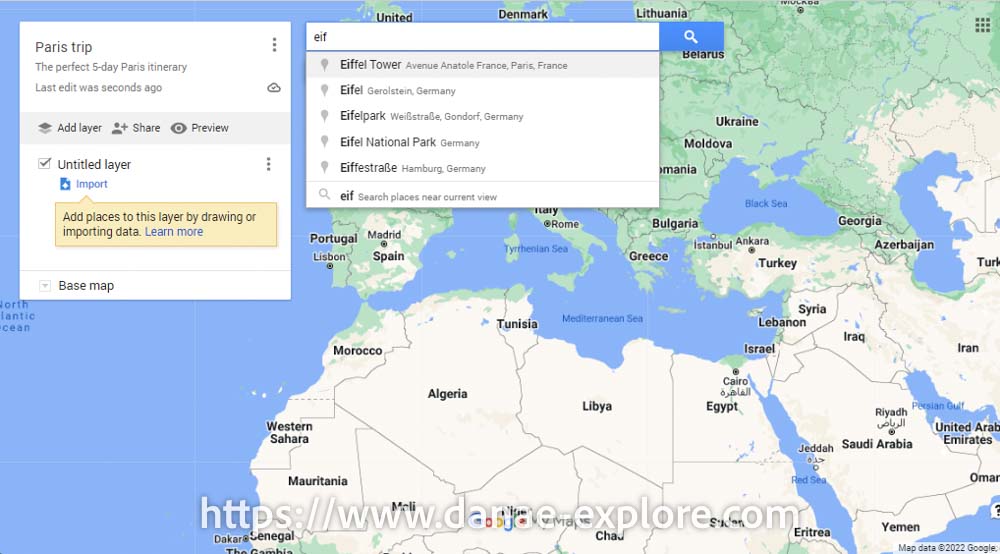
.
Once you have selected the correct location, it will appear on the map with an info box showing details such as name (as shown on Google Maps), address, telephone, official website, Google rating, and more, along with the option “+ Add to map”. Click on this option to include the location on your map.
.
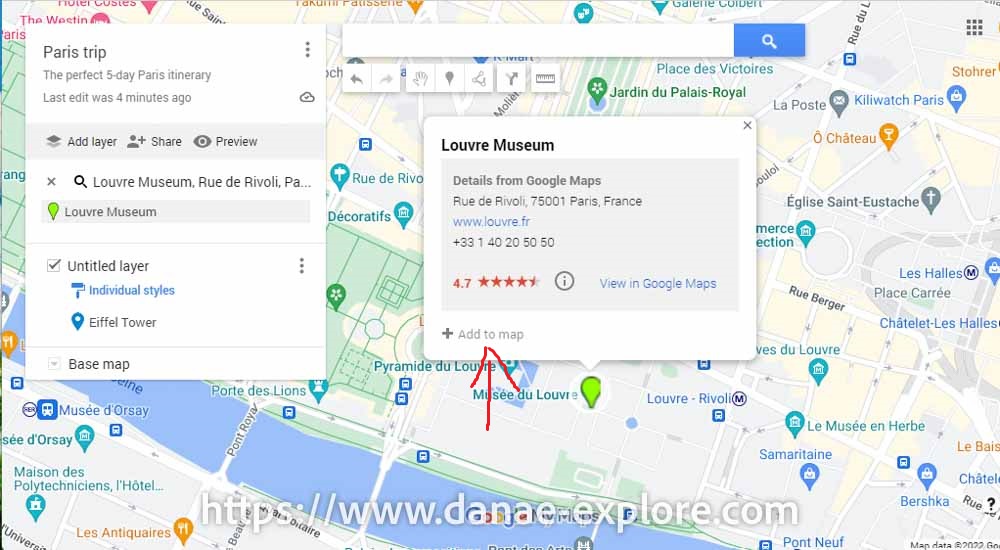
.
Done! The Louvre Museum is now added to your map. You’ll see it appears in a layer (in this case, the generic “untitled layer” — you can rename or organize it later if you want).
Just repeat the same steps for the next items on your itinerary. Put everything on the map: tourist attractions, restaurants, bars, cafés, train stations, subway stations, theatres, museums, friends’ houses, etc. Speaking of that, here are some great tips for a 3 day itinerary in Paris.
You can also select points directly on the map or enter GPS coordinates. This may not be necessary in a city like Paris, but it can be very useful in other destinations.
.
.
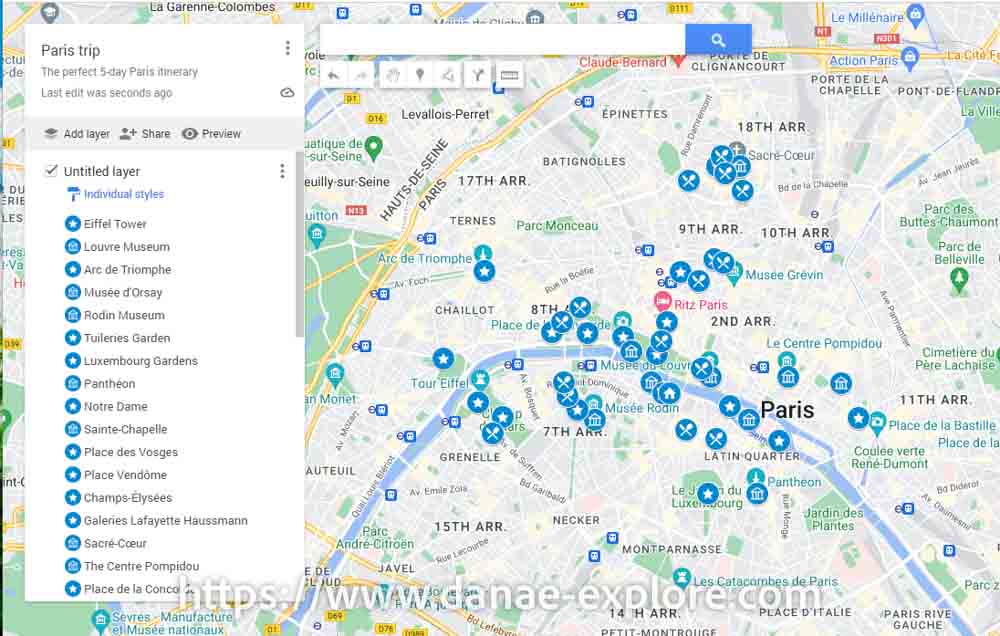
After spending some time exploring the map and adding everything you want to do and all the recommendations you’ve received (don’t worry, it’s easy to add more later), your map will look something like this:
.

.
How to organize places into categories on Google My Maps
Now comes the real planning: I like to start by dividing everything into categories.
Identify the categories that make sense for your map.
For example, for this trip, I chose these categories (of course, they change depending on the style and purpose of each trip):
- museums, palaces and churches
- general attractions
- hotel
- restaurants, bars, cafés, ice cream spots, etc.
- transport (train and bus stations, airports, car rental offices, etc.)
- others
Are you traveling with kids? Add playgrounds to your map! They will be very important during your trip, I guarantee it.
.
Set a specific icon for each category
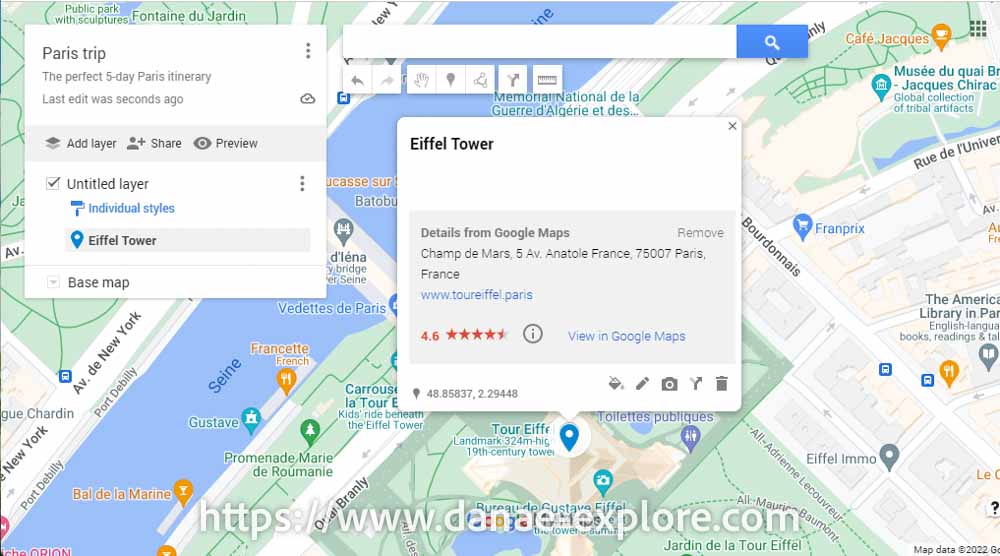
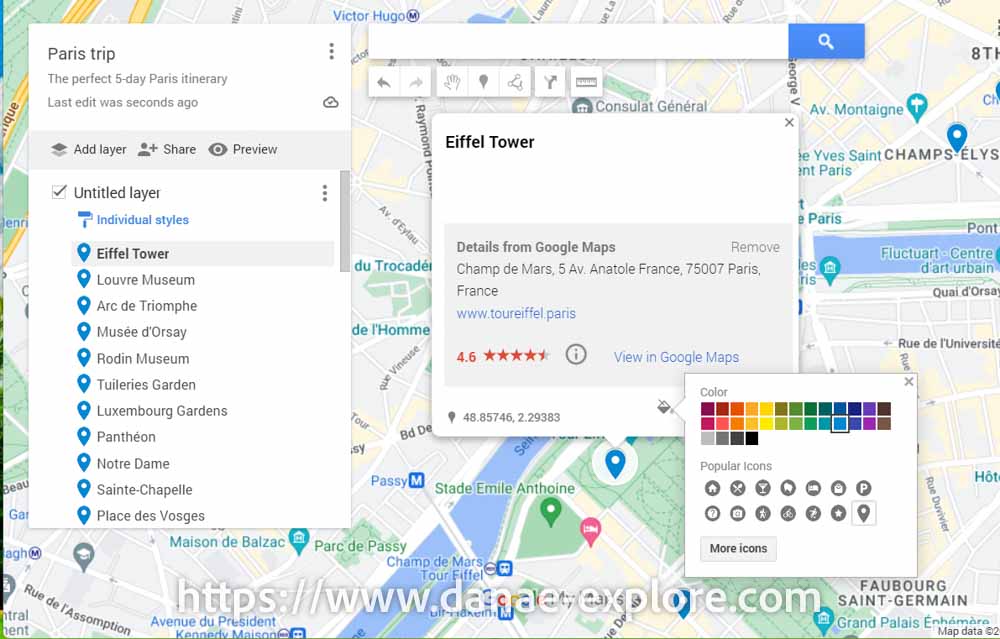
For each place, I assign a specific icon. This is done by clicking on the place name in the list; the info box will appear again on the map. You’ll see a “paint bucket” icon (see picture below): that’s where you customize the pin.
.
.
Choose the specific color of each item
By clicking on this “paint bucket”, you can choose the pin color and icon. I usually use colors to organize by day, but if you prefer to sort by category, feel free to do whatever works best for you.
NOTE (see picture above): by clicking on the “pen” next to the paint bucket, you can edit the description of the place and add notes; by clicking on the photo icon, you can add photos (very handy); the arrow lets you create routes (I’ll explain this later), and the trash icon deletes the location from your map.
.
.
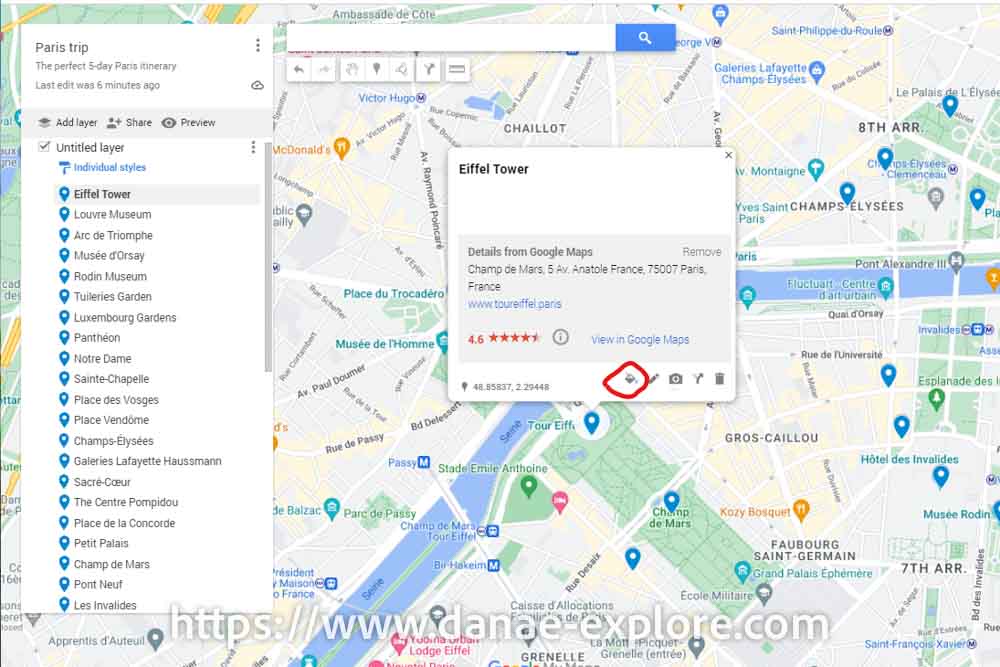
You can also click on “more icons” and choose the one you prefer (in this example, I searched for a museum icon, which wasn’t among the “popular items” — random thought aside, but I’ll keep this post focused).
Then it’s time to get to work. One by one, I change the icons of the places on my map, and the map starts to look like this:
.
.
How to group locations into layers in Google My Maps
Next step: I group the activities I plan to do each day. This also depends on what works best for you or for the specific trip you are planning, but the general idea is to group places based on proximity or ease of getting around.
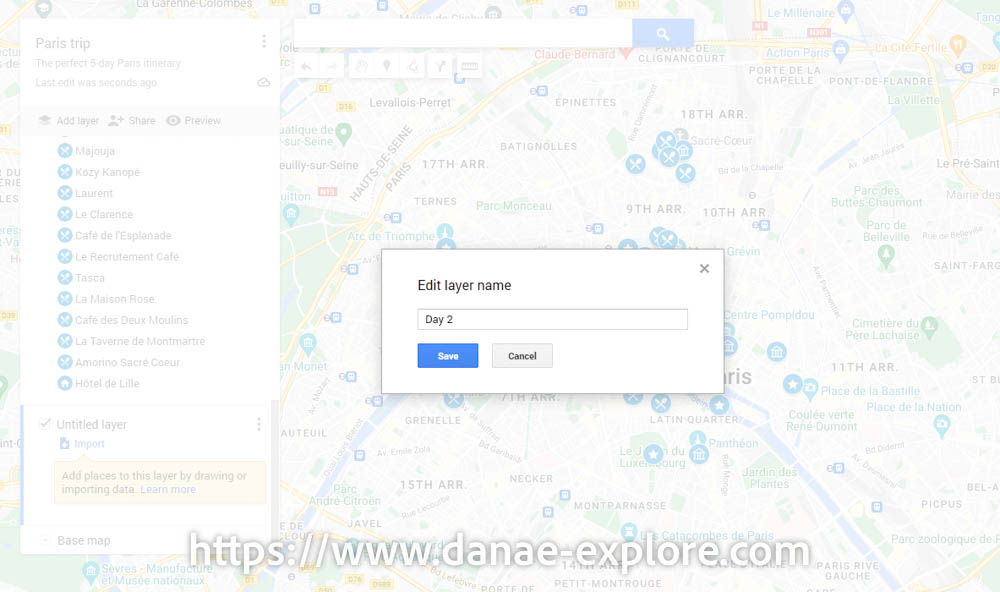
At this stage, I find it very useful to create layers, usually one for each day. Just click “add layer” and rename each layer by clicking on the three dots next to its name. You can create as many layers as you find useful.
.
.
With the new layers created, move the locations to the appropriate layer. Just click on the location name and drag it to the correct layer.
If you click on the location icon on the map, it is automatically highlighted in the list, which helps you identify nearby places and organize them into the right layer.
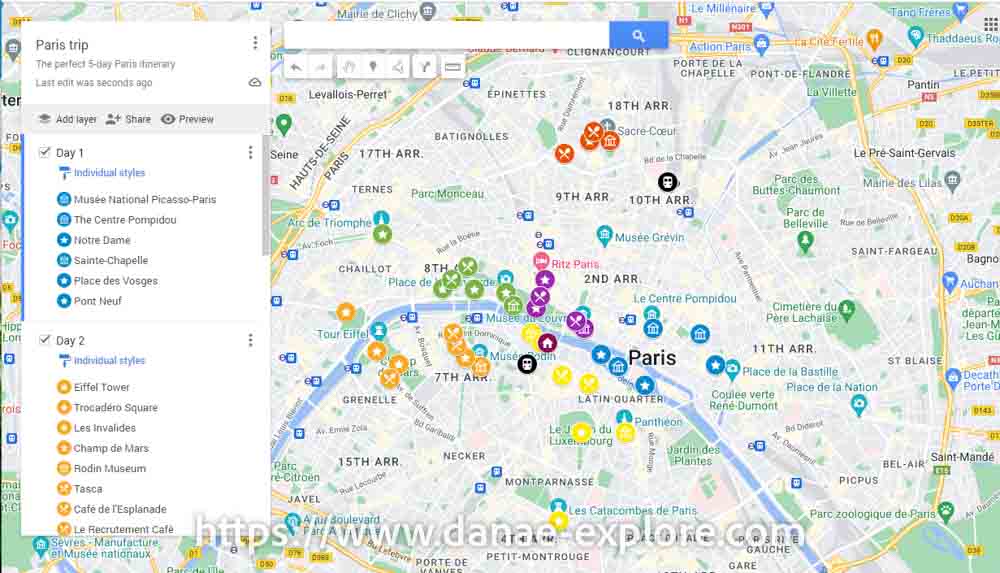
I like to use different colors for each day, which makes it much easier to visualize the plan for each day. I also like to create one layer for the hotel and another for transport points (train stations and airports).
The map now looks like this:
.
.
It’s now much easier to see which area of the city we’ll be in each day, and which places we plan to visit.
One advantage of using layers is that you can hide any of them at any time, and the items in that layer won’t appear on the map.
Keep in mind that you can’t create more than 10 layers. So if you’re planning a longer trip, it’s better to organize your places by week, by region, or even create multiple maps.
.
How to create routes on foot, by car or by bicycle
Now it’s time to map out your routes.
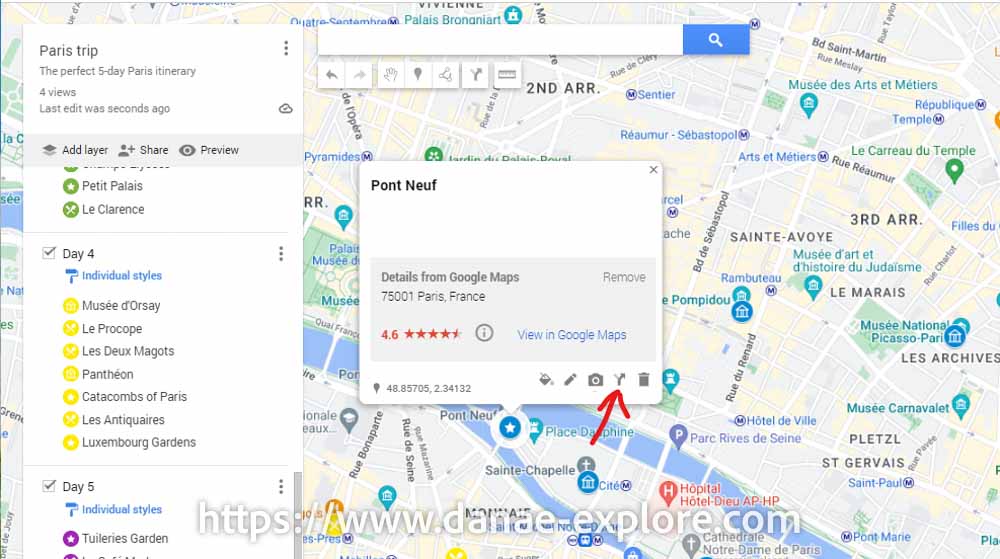
On the map, click on the starting point. Let’s say that on day 1 we want to start our sightseeing at Pont Neuf.
By clicking on the Pont Neuf icon, the info box opens, which you’re already familiar with. Click on the arrow icon (between the camera and the trash can — photo below), and a new layer will automatically be created. You’ll be prompted to choose a destination.
.
Click on the next destination. You can use a location you’ve already added or select a new one directly on the map.
My Maps defaults to “driving” mode, so in our example, click on “driving” and switch to “walking”.
Once this is done, the route between the two points will be displayed.
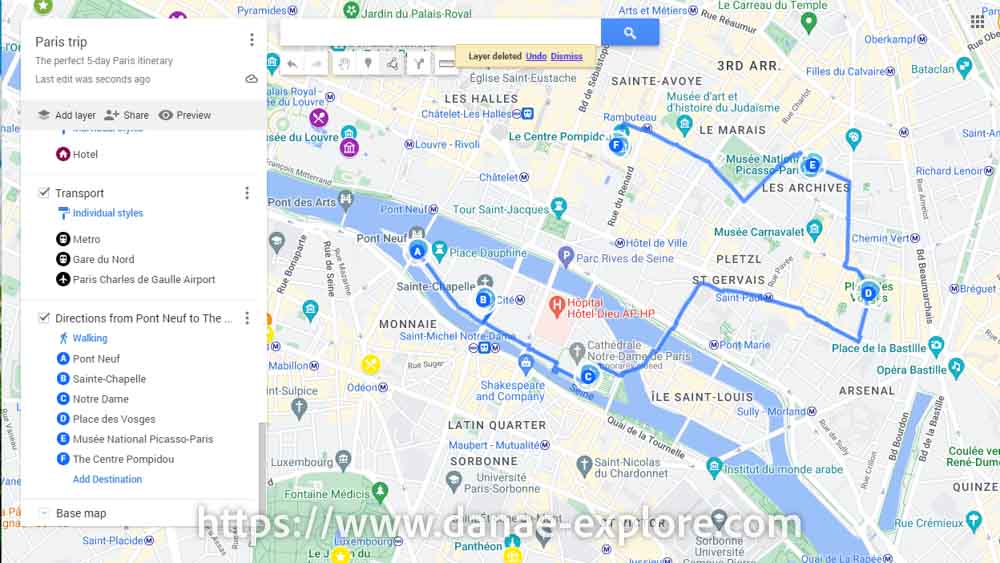
From there, just click on “add destination”, include all the stops for the day, and rearrange the order as needed. Each route can have up to 10 stops.
Your route is ready:
.
.
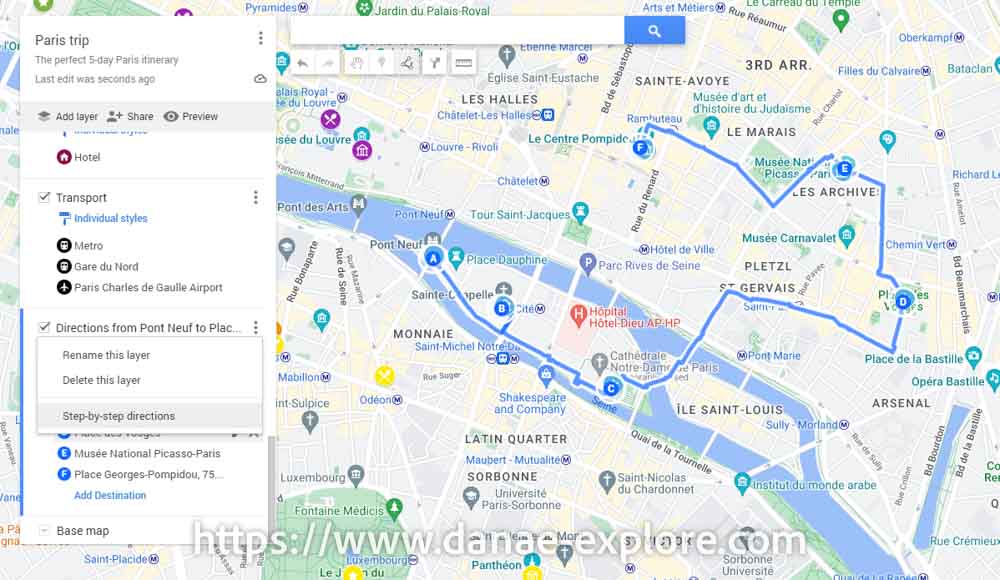
Click on the three dots next to the route name, and you’ll see the “step-by-step directions” option. Click there to view the details.
.
.
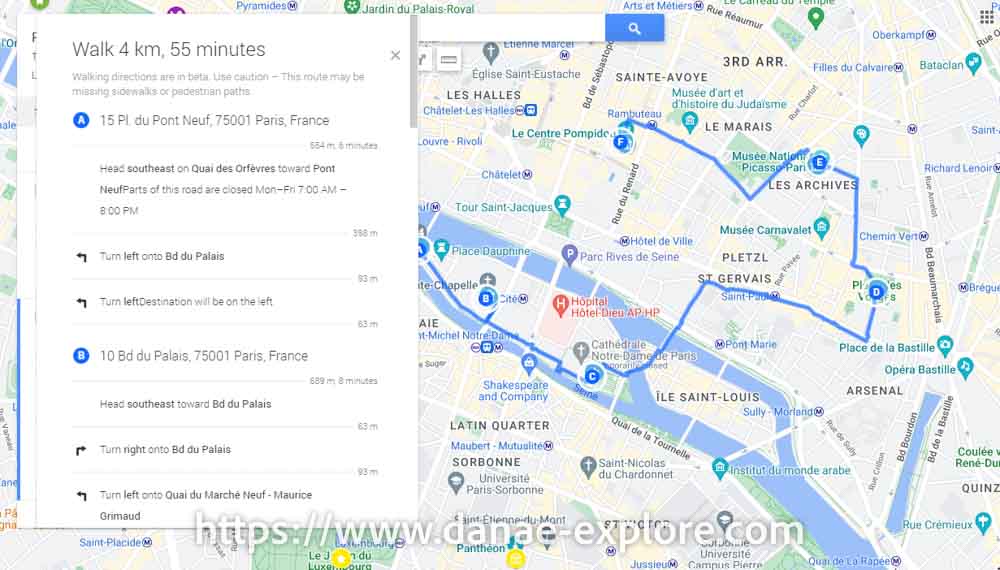
It shows the total distance and time for the route, as well as the distance and time for each segment:
.
.
Now repeat this for the rest of your planning and make the necessary adjustments. Of course, changes will happen (especially with walking routes), but you now have a clear overview and can evaluate whether your plan is realistic.
.
How to share your travel map
Now it’s time to share the map with your travel companions. Just click on “share” and choose how you want to share it. I usually send the link, but you can also make the map public
.
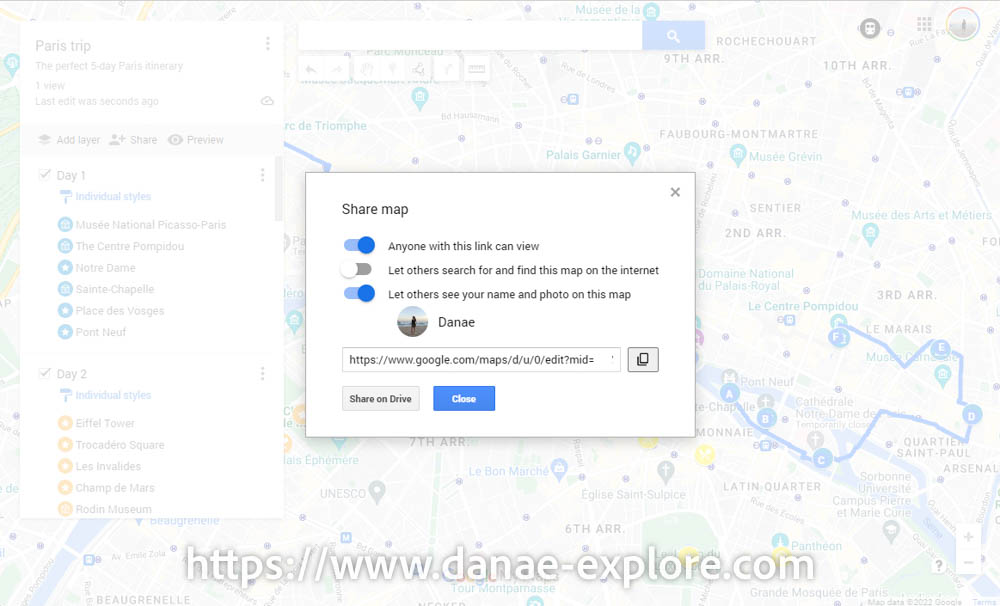
.
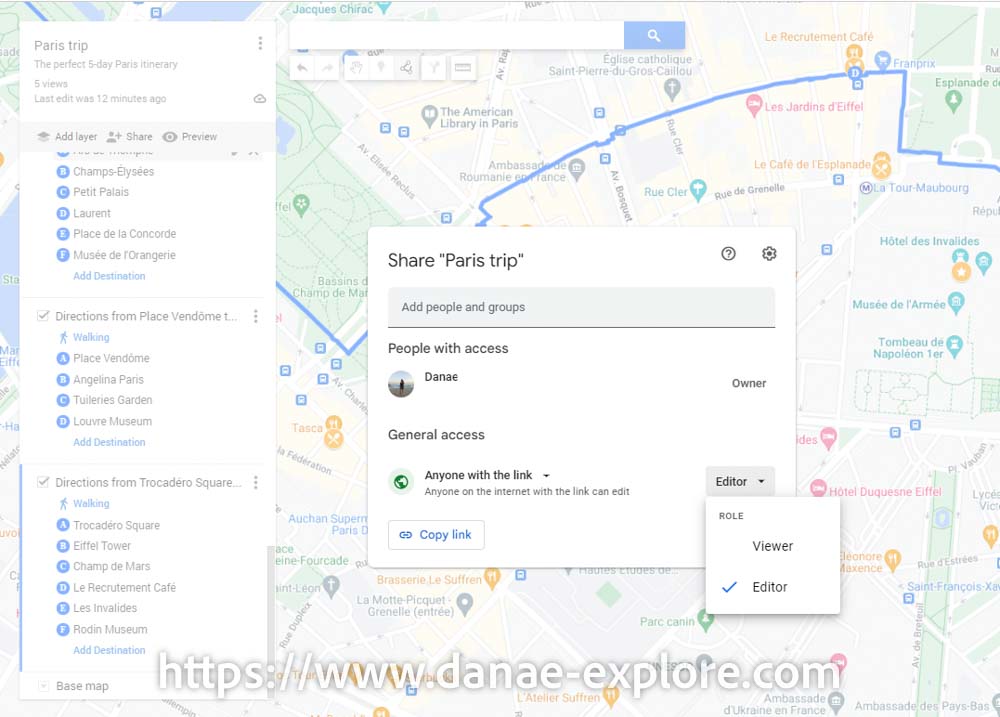
You can allow people who receive the link to edit the map, which makes it a great tool, as it becomes easy to include everyone’s tips and recommendations. It turns into a team effort, where everyone can contribute. To do this, click on “share on drive”, add the name and email, and select “Editor”.
.
.
Make use of maps available online
Maps created in My Maps can be embedded in websites and blogs (as I did below), so when you’re browsing blogs for travel tips, you might come across maps like this created by others. Enjoy it — it’s a gift they’re sharing with you.
.
.
By clicking on the icon next to the map author’s photo, you can see the list of places, layers, routes, and more.
Using the share icon, you can send the map to anyone.
On the icon that looks like a square, next to the share icon, you can open the map in My Maps. Then, by clicking on the three dots next to the map name, you can create a copy in your Google account. It will stay there unless you delete it, ready to use whenever you want. You can edit this copy, so if you find a good map online, most of the work is already done — you just need to add your personal touch.
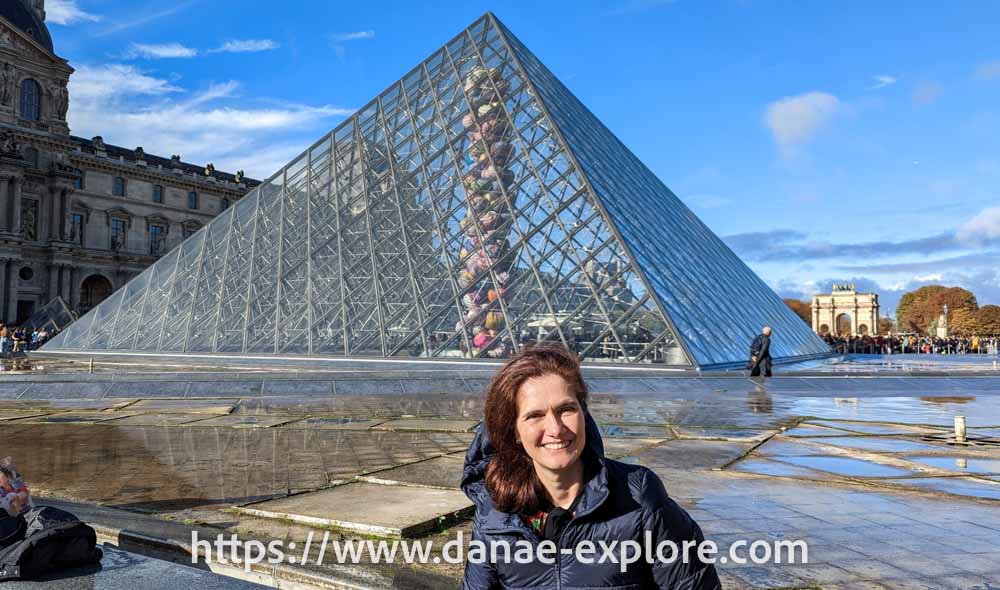
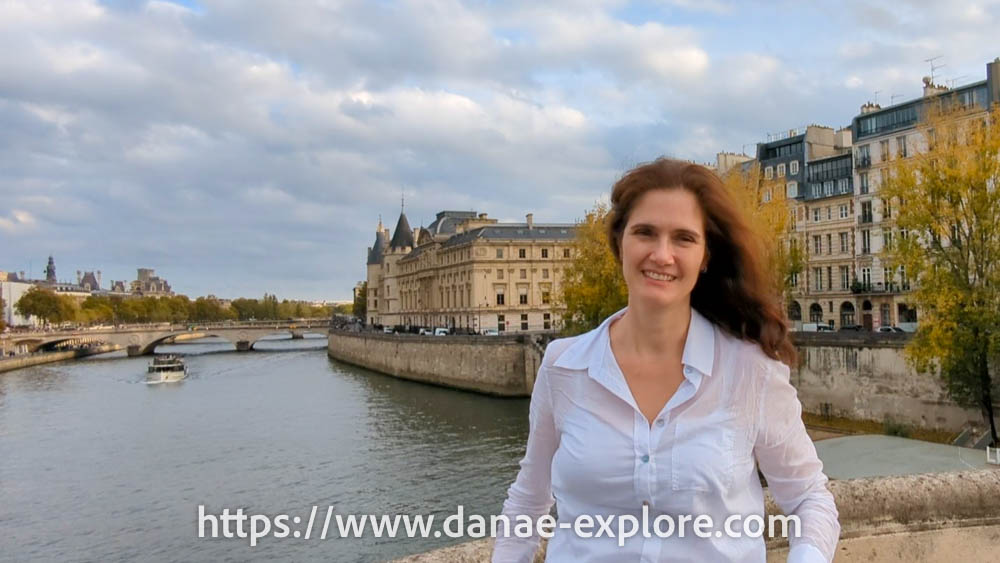
And to finish, yes, I was in Paris and had a blast with this 5-day Paris itinerary!
.
.
At the end, don’t forget what is really important
These are just plans, and plans are meant to change.
Get off the beaten path, get lost in the streets, walk aimlessly.
Are you enjoying a place and want to stay longer? No problem — you’re on vacation, you don’t have to follow the plan just because it’s on your map.
Try places that aren’t on your map, stop at a street food stand, grab an ice cream if it’s hot, or a hot chocolate if it’s cold.
Discover a gallery you didn’t even know existed, enjoy a viewpoint you didn’t expect much from, let the kids play at yet another playground along the way.
Trips are short. Make the most of them. But always leave some space for the unexpected, for creativity and spontaneity. That’s when the best moments happen. Enjoy them!
“A good traveler has no fixed plans and is not intent on arriving” – Lao Tzu
.
.
Here are the websites I always use to plan my trips:
– 🛌 Accommodation: Booking
– ☀️ Tours & activities: Civitatis & Get Your Guide
– 📱 eSIM for mobile data: Airalo e-SIM – use promo code DANAE2375
– 🚗 Car rental: RentCars – use promo code DANAE
.
Did you like these tips? Then follow me on social media:
Instagram @danae_explore
Pinterest @danaeexplore
Comments or questions? Contact me on social media! I love to chat about travel 😉
And before you go, don’t forget to SAVE THIS PIN to your PINTEREST account, so you can find this post on how to plan a trip using Google MyMaps whenever you need it! whenever you need it!